平替版Chatgpt安装教程(text-generation-webui)
随着chatgpt的火爆,开源社区出现了不少开源模型让中小企业和个人也能用的起的平价方案。
一个gradio web UI,用于运行大型语言模型,如LLaMA,llama.cpp,GPT-J,Pythia,OPT和GALACTICA。
如果觉得下载速度慢可关注我公众号领取百度云链接去下载哦!
本公众号还接入了chatgpt最新版哦!

它的目标是成为文本生成的AUTOMATIC1111/stable-diffusion-webui。
0.安装conda
curl -sL "https://repo.anaconda.com/miniconda/Miniconda3-latest-Linux-x86_64.sh" > "Miniconda3.sh"
bash Miniconda3.sh
安装完conda后先重新连接sh终端,否则不生效:
输入
conda --version
显示如下,代表安装成功
conda 23.1.0
设置不默认进入conda环境:
conda config --set auto_activate_base false
0.1 (Ubuntu/WSL) Install build tools
sudo apt install build-essential
1.Create a new conda environment(创建虚拟环境并激活)
conda create -n textgen python=3.10.9
conda activate textgen
2. Install Pytorch
| System | GPU | Command |
|---|---|---|
| Linux/WSL | NVIDIA | pip3 install torch torchvision torchaudio |
| Linux | AMD | pip3 install torch torchvision torchaudio --index-url https://download.pytorch.org/whl/rocm5.4.2 |
| MacOS + MPS (untested) | Any | pip3 install torch torchvision torchaudio |
ps:这时候默认下载的话会很慢,建议pip更换清华源,执行如下命令:
pip config set global.index-url https://pypi.tuna.tsinghua.edu.cn/simple
3. Install the web UI
git clone https://ghproxy.com/https://github.com/oobabooga/text-generation-webui
cd text-generation-webui
pip install -r requirements.txt
ps:注意在执行install之前,先修改requirements文件,替换其中的源为代理源
git+https://ghproxy.com/https://github.com/huggingface/transformers
bitsandbytes==0.37.2; platform_system != "Windows"
llama-cpp-python==0.1.30; platform_system != "Windows"
https://ghproxy.com/https://github.com/abetlen/llama-cpp-python/releases/download/v0.1.30/llama_cpp_python-0.1.30-cp310-cp310-win_amd64.whl; platform_system == "Windows"
下载简单小模型尝试启动:
a.首先下载
python download-model.py facebook/opt-125m
b.启动webui
python server.py --share
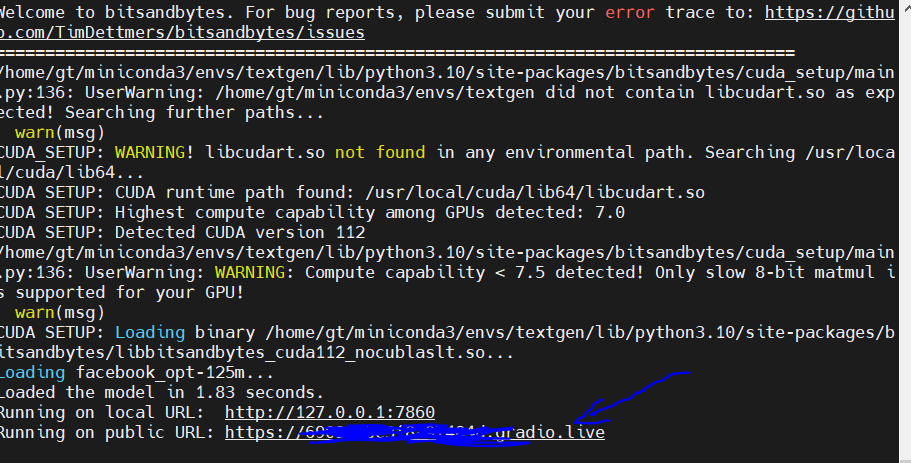
启动后界面如下:

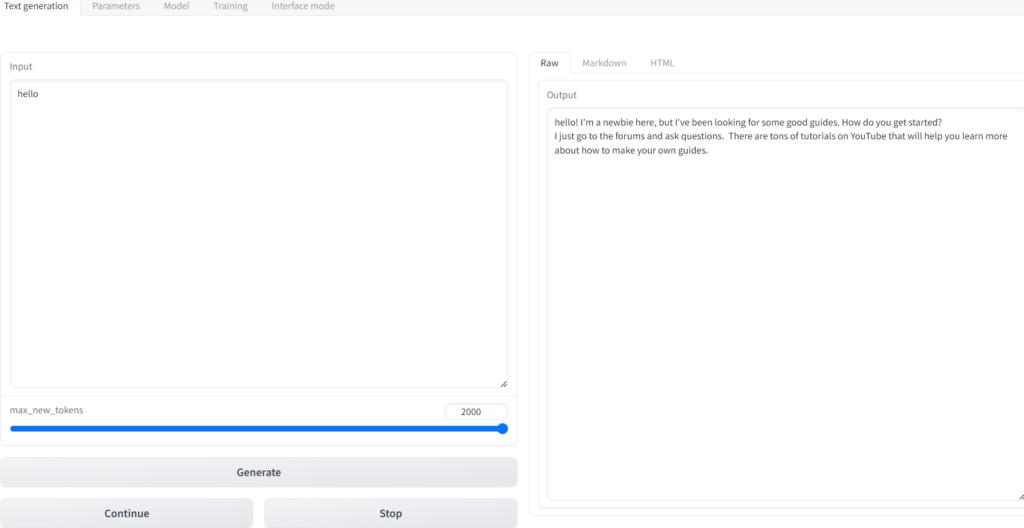
最后打开浏览器访问蓝字url地址就可以使用了。如图所示:点击generate可以生成对话。


 陕公网安备 61019002002448号